Wednesday, December 25, 2013

A Bowl, Carved, not turned.

My last blog described the steps involved in taking a log and moving through the process to make it a bowl on the lathe. This time around I’ll show how to take a section of that same log and make a bowl by carving.


Here is the log strapped down to my carving stand and the first section rounded off. The top here will end up being the bottom of the bowl when it’s done.

This cute little tool is what I use for roughing out my bowls and sculptures. There are 14 chainsaw teeth on this thing and the power is from a Dewalt grinder. Impressive to use and not as intimidating as it looks.

Here is the outside of the bowl roughed out and ready to be turned over to start the shaping of the top.

The first half of the top is shaped as well, now to turn it around and do the other end.

All the rough work is nearly finished, I just need to cut through that wonderful grain to make the handle portion. What a shame, but it has to be done.

The handle is showing its basic shape and the ‘dish’ part is starting to take form as well. For in here I have a smaller and less aggressive disk on another grinder but I forgot to get photos of it. I also used chisels and rasps for some of the tighter places. They give me a bit more control as well. 

Fastening the bowl to a board after I sanded the bottom flat allows me to clamp it to the carving stand and keeps the strap out of my way.

The grain in the bottom of this is going to be Gorgeous!  

And here is the rough sanded product. It needs to be set aside to dry for a few months and then I can finish sanding and add the finish. I’m thinking this will make a great “Easter” basket for someone.

If you like my work, please comment below and share the link with All of your friends.


Thank you! 

Sunday, December 22, 2013

Branching out a bit

While my main product line is going to continue to be bowls, both turned and or carved, I am also adding smaller items to the mix. Production allows me to use the smaller pieces of wood that are left from the bowls, thus making my whole product line more “green” by increasing my motto of Reuse, Recycle, Reclaim.
So, what am I adding? Well to start with I am adding darning mushrooms and eggs. I’ll start out with the a variety of woods and move on to combined woods if the market tells me they are desirable. So, you tell me, are they? Below are a couple of examples for you to view. The first one and the last one are Walnut and the middle two are Oak. 


You can find them for sale on my Etsy page: http://www.etsy.com/shop/RockRabbitEnterprise

Do you, my loyal followers on this blog, have any other items you would like to see me offer for sale? Leave a comment below and I’ll see what I can turn up, so to speak. J

Monday, December 16, 2013

Steps involved in making a bowl

            Several people have asked me how the process of turning a tree into a bowl. What are the steps involved? Well, here are the steps and rough finished products to show that process.
First we start with a tree. This Juniper was standing at the corner of a house in town and she contacted a friend of mine who is also a member of the local wood turning club. He recruited me to help him cut them down and haul off the limbs along with the useable wood. What you see is part of my share, he took some as well and the rest we took to the club to distribute to the other turners.


From there I cut a section of log that roughly matches the diameter. In this case, the diameter is roughly 12” so I cut the section 12” long. Add to that, my lathe will only do bowl 12” in diameter or less and we are off and running. The next step is to cut the block in half vertically, taking the “pith” or center section of the log out. That section will cause nothing but problems. With the halves cut I use plywood temples to cut them to rough circles that can be mounted on the lathe. Here I have the first roughed out bowl and five more pieces ready to turn.


The next step is to mount the piece on a “screw chuck” which is a fancy word a Big wood screw that’s held in the 4 jaw chuck on my lathe. I then bring up the tail stock and put pressure on the blank to help keep it in place. Since the wood is not yet ‘round’ it is out of balance and makes the lathe vibrate if it’s running too fast. One view shows the chuck on the front of the piece and the next is the tailstock in place. This will be a “natural” edge bowl, meaning the bark will show on the finished piece.


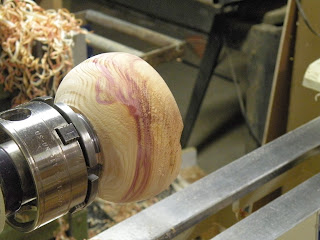
Here is a shot of the bowl after I have shaped the outside, made a tenon on the bottom so it can be held in the 4 jaw chuck. The shavings on the floor are from the previous bowl and the shaping of this one.


This shows the inside of the same bowl with the “natural edge” and the fantastic grain that Junipers are known to produce.


Here is one of the smaller pieces, but this time I will make a traditional bowl where all the bark is taken off and a flat edge is produced. The hole showing is in the part of the bowl that will be the inside, so it will get turned out once the bowl is done. I’ll make a tenon on the other side, turn the bowl exterior off this side, reverse it in the chuck.


Here is that same bowl held by the tenon.


Remember that selection of blocks? Here is the finished, well Nearly finished, can’t sand them until they have a few months to dry, bowls. The one piece on the right had too many cracks to be safely turned into a bowl so it will be cut down into smaller square sections and used for other products.


And that is the steps to produce a bowl. There are variations on how you hold it in the lathe (glue blocks, drive spurs, etc.). The shapes are mostly whatever the wood tells me when I’m turning it or the approximate shape a customer has told me they want.


Friday, December 13, 2013

Plans are only a place to start!

            The plan today was to rough out a new bowl blank (I owe someone a salad bowl) and then rough out a double stacked bowl idea I have had in the back of my mind for a few months now… but that plan went out the window when my phone rang.
            A friend had been waiting for some lag time in his painting business to work on his bandsaw and I had volunteered to help him. Could I come over and help him this morning? Well sure, and if he didn’t mind I had some rough cut walnut slabs/ boards that I wanted to re-saw that wouldn’t fit though my smaller bandsaw.
            Along with that we had our order of tool steel in and he had made arrangments to meet with our machinist friend to have flutes put in so we could start the process of making tools for the lathe.
            With just a few more toy airplanes to cut out for his local community school craft fair we got to work. Those finished in 20 minutes or so, we set about changing the blade to a bigger one for doing the re-saw work. This was a new-to-him saw and we knew it needed some TLC. With the new blade in place, some adjustments needed to be made on the blade guides. That led to some adjustments to the table and to the idler wheel, and the fence… well you get the picture. A short quick job soon turned into a long, drawn out job. But, WOW, the walnut boards are going to be Fantastic!
            Ok, so on to the machine shop, that’s beside the guy’s house about 10 miles away… in the 3” of slushy snow, on the windy road… Well it IS, but it was not really that big a deal, just sound more dramatic! J
            Our machinist does not get to town much, runs a one man shop and likes to “talk shop” when I show up. What could have been a 10 min, drop and run, process took almost two hours as he showed us all his latest projects and we discussed and re-designed some other projects we were thinking about. (a jig to make spheres of uniform diameter on the lathe).
            Back home in time to get started drawing toy car patterns on to hard board to use up the scraps left over from the Toys For Tots campaign, putting me ahead of the game for next year. That barely done and Lynn is home from work, meaning it’s time to think about dinner and start working on my blog, twitter, and facebook acounts to keep everyone up to speed on what’s happening!
            Where has the day gone?
            Thanks for stopping by and look for photos of walnut boards and bowl roughouts soon!

Richard

Wednesday, December 11, 2013

Passion for wood working

Hello everyone. Starting today I’m on a new push to get my woodworking out to those that would like to have some fine décor or accessory items for their homes. Several different aspects are involved in the process, but to start I have created a twitter account, @RockRabbitEnt to let everyone know what I’m up to in the shop and what projects will soon be available for purchase. Those same items, and others, will be on my Etsy page as well at https://www.etsy.com/shop/RockRabbitEnterprise. There are items of all types there, small gift ideas to luxury home décor objects. As always my Flickr site, http://www.flickr.com/photos/rockrabbit/ will have photos of my work as well as tools produced, toys made for donation to the local Toys For Tots group here in Kalispell. Of course there will also be some photos of my dogs, my trips around the country and other aspects of my life that will show up on my wood work at one time or another.
And since you are reading this, you know that I already have a blog, http://rockrabbitsblog.blogspot.com/. That is going to change a bit and be updated on a weekly basis with photos of current project in progress, wood that will become a project and recently finished projects that will be listed on my Etsy page.
Please take a look at the photos below, view all my various web pages and send me a “tweet” when you have the time. Share all of the above with your family and friends, it is only by the gracious word of each of you that I can move forward with this business and make my passion for creating art work from wood something everyone can share in their own home.

Richard


A small turned box with a simple flower carved in the top would make an excellent small jewelry box.

A small “ring box” that will hold one to perhaps a few rings. Out of sight, out of mind and a lot harder to lose under the bed!

The “Balanced Bowl” set is suitable for a coffee table display. The big bowl is a hand carved Walnut burl and the companion bowl is of hand shaped copper, patinaed in a blue pattern. The hand wrought “balance beam” is textured to look like a tree limb with a “curled root” to hold the copper bowl and handmade “leaves” under the Walnut burl. The bas is a large Walnut block, shaped to resemble a section of tree trunk.

A “forest” of ring holders. Use these to safely hold and display your rings either on your night stand, bathroom counter or perhaps at your own booth to sell your own custom made jewelry. Made from Walnut, Maple, Poplar, and many other species of wood, they range from 3” to 7” tall.

All of these items are available on my Etsy site listed above.
Thank you for your time to read my blog and Please pass it along to all your family and friend to help me get the word out to as many people as possible. It is with your help that I can take my passion for woodwork over the top and make it into a business as well.

THANK YOU


Richard